No drill bathroom decor is something I wish I’d figured out before my first rental bathroom makeover — because I wasted months staring at ugly beige walls, thinking I couldn’t do anything.
Turns out, you can do a lot.
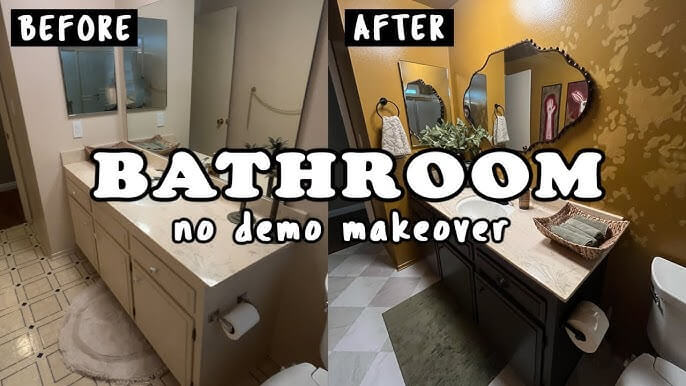
No Drill Bathroom Decor Ideas (I’ve Tried Most of Them)
The wall situation nobody warns you about
My first apartment bathroom had this off-white, slightly sticky wall situation going on.
No texture. No character. Just… blah.
I wanted to hang stuff. Obviously I couldn’t drill. So I did what most renters do — I stuck some random adhesive hooks on the wall, hung a small frame, and called it a day.
It fell off in two days. Hit the toilet tank on the way down.
That was the moment I realized there’s a big gap between “renter-friendly” as a marketing phrase and things that actually work in a steamy, humid, wet bathroom environment.
Why bathrooms are a different animal
Most no-drill advice online treats all walls the same.
They’re not.
A bathroom wall deals with steam, temperature shifts, and moisture every single day. The adhesive that works perfectly in your living room can fail completely above the sink.
I learned to always prep the surface first. Wipe down with alcohol before sticking anything. Wait 24–48 hours before putting weight on it. That alone saved me so many frustrated evenings.
Also — textured tile is the enemy of adhesive strips. Smooth tile? Great. Textured or grout-heavy surfaces? That stuff will peel off within a week no matter what brand you buy. I tested this more times than I’d like to admit.
What I actually put up (and what held)
The suction shelf that changed everything
I was skeptical of suction shelves for years. Seemed like a shower toy.
Then I got one with a dual-lock vacuum system instead of the cheap rubber cup kind.
It’s been on my shower wall for over a year. Holds my shampoo, conditioner, and a small plant. Hasn’t budged. The key is pressing out all the air and re-sealing it every few months — takes ten seconds.
If you’re redoing your renter-friendly shower storage, this is where I’d start.
Peel-and-stick tiles on the backsplash
This one took me three attempts to get right.
The first time I used cheap tiles that looked plastic and fake. They bubbled. Embarrassing.
The second time I picked a proper peel-and-stick marble tile with a matte finish. Still looked a bit flat.
Third time — I used a hexagonal subway-style peel-and-stick panel. Positioned it just above the vanity, four panels wide. Suddenly the whole bathroom had a focal point.
The trick is treating it like real tile. Measure twice. Cut carefully. Press firmly from center outward. Don’t rush.
When I moved out, I peeled them off slowly with a hairdryer on low heat. Zero residue.
Adhesive toilet paper holders and brush sets
This sounds boring. It’s not.
My landlord’s original toilet paper holder was this chrome plastic thing that wobbled every time you pulled paper off. I hated it.
I replaced it with an adhesive matte black set — toilet paper holder plus a brush holder. Both mounted with 3M-style adhesive that came pre-applied. I cleaned the tile with the alcohol wipe that came in the box, waited 48 hours before using it, and that thing held solid for two years.
Matte black in a beige bathroom.
Instant upgrade.
If you’re curious about no-drill bathroom accessories beyond just storage, these functional pieces make a surprisingly big visual difference.
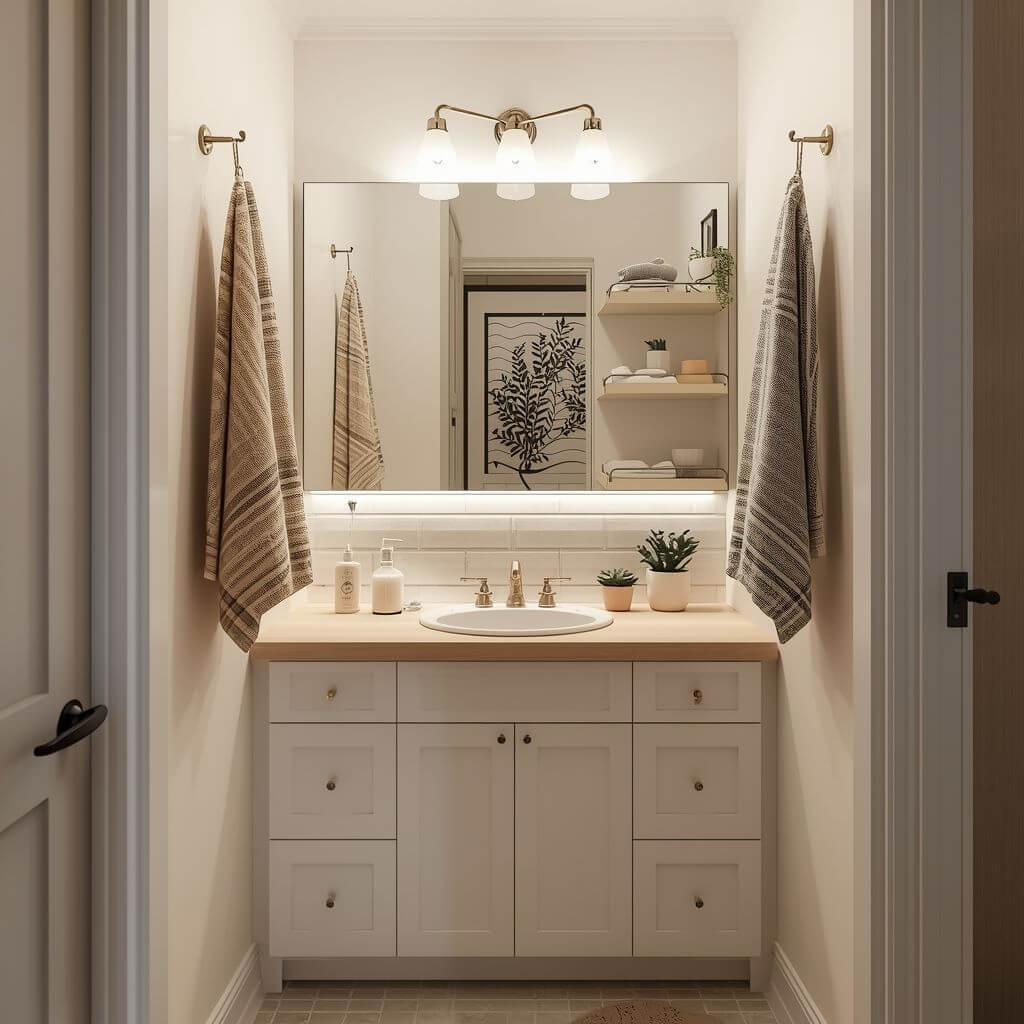
Decorating the walls without touching them
Leaning things instead of hanging them
I stopped trying to hang every single thing.
A tall bamboo ladder leaned in the corner holds two rolled towels and a small hanging plant. Looks intentional. Costs almost nothing. Doesn’t touch the wall at all.
Same with a small framed print — I lean it on the back of the toilet tank. Add a small candle in front of it. Done.
Leaning is underrated as a decorating strategy.
The mirror hack
Replacing a landlord’s ugly vanity mirror is usually off the table.
What I did instead: leaned a decorative round mirror against the wall beside the sink. A small round one from a thrift store. It added depth, made the bathroom feel bigger, and cost me $12.
Also, if the mirror itself is the problem — a simple stick-on mirror frame (they sell these specifically for bathroom mirrors) transforms the entire vanity situation without removing anything.
Plants change everything
I used to think plants didn’t belong in bathrooms.
Wrong.
A small pothos on the edge of the tub. A trailing string of pearls on the window ledge. A tiny cactus on the back of the toilet.
Plants add life to a no-drill bathroom in a way no product can replicate. They don’t need drilling. They don’t require approval from your landlord. And they make the space feel curated, not decorated.
If your bathroom has a window — even a small one — a plant will thrive there. And if you’re building out the whole small rental bathroom aesthetic, plants are the piece that ties everything together.
Towels and textiles — the most underestimated fix
I spent so long obsessing over the walls. Completely ignored the towels.
Then I swapped out my mismatched towels for a matching set in warm terracotta. Same bathroom. Completely different vibe.
A chunky waffle-weave bath mat in front of the tub. A hand towel folded properly over the vanity. Two matching candles on the back shelf.
That’s it. The bathroom looked styled without a single new installation.
Renter-friendly small bathroom styling doesn’t always mean adding things. Sometimes it’s just making what you have look intentional.
Mistakes I kept making (and finally stopped)
Overloading adhesive hooks. They have weight limits for a reason. I learned that the hard way when a hook holding a heavy robe came off and took a chunk of paint with it.
Using generic command strips in humid zones. Some adhesive strips are not rated for bathrooms. The packaging matters — look specifically for “bathroom” or “moisture-resistant” labeling.
Cluttering every surface. Less is more in a small bathroom. I kept adding things thinking more decor = better bathroom. It just made it look chaotic.
Matching everything too perfectly. Ironically, when I tried to match every single thing — same color, same material — it looked staged. A mix of textures with a consistent color palette felt way more real.
A quick word on peel-and-stick wallpaper
I’ve seen gorgeous peel-and-stick wallpaper in bathrooms online.
I tried it.
Mine bubbled at the seams within three weeks because of shower steam. It wasn’t a bad product — it was the wrong placement. Above the toilet or on a wall far from the shower? Probably fine. Directly near the shower or tub? I wouldn’t risk it again.
If you love removable wallpaper for small bathrooms, test one panel first. Wait two weeks. See how it holds before doing the whole wall.
FAQ
Can adhesive hooks really hold heavy things in a bathroom?
Yes — but only if you’re using moisture-rated strips, prepped the surface with alcohol beforehand, and stayed within the weight limit. A heavy winter robe? Probably too much. A lightweight loofah or small towel? Totally fine.
What’s the safest way to remove adhesive from tile without damage?
Use a hairdryer on low heat for 20–30 seconds to soften the adhesive, then slowly peel at a low angle. Finish with an alcohol wipe to clean up any residue. Works almost every time on smooth tile.
Do suction cup shelves actually stay on in a wet shower?
The cheap ones? No. Suction shelves with a dual-lock or pump-style vacuum system hold significantly better. Reseal every couple months and they’ll last.
Is peel-and-stick tile actually removable when you move out?
Yes — when you remove it slowly and use heat. The faster you pull, the more likely it is to leave residue or take paint with it. Take your time and go slow.
The bathroom doesn’t need a renovation. It needs a perspective shift. No drill doesn’t mean no style — it just means you have to be smarter about how you work with the space you’ve got.

Scott is the creator of TheHomeDelight, where he shares simple, budget-friendly home decor ideas that actually work. From small space makeovers to cozy styling tips, he helps you create a home you love—without overspending